
A Homeowner's Complete Guide to Weatherstripping
Drafty doors and windows waste energy year-round. This guide covers every weatherstripping type, where to use it, and how to install it.
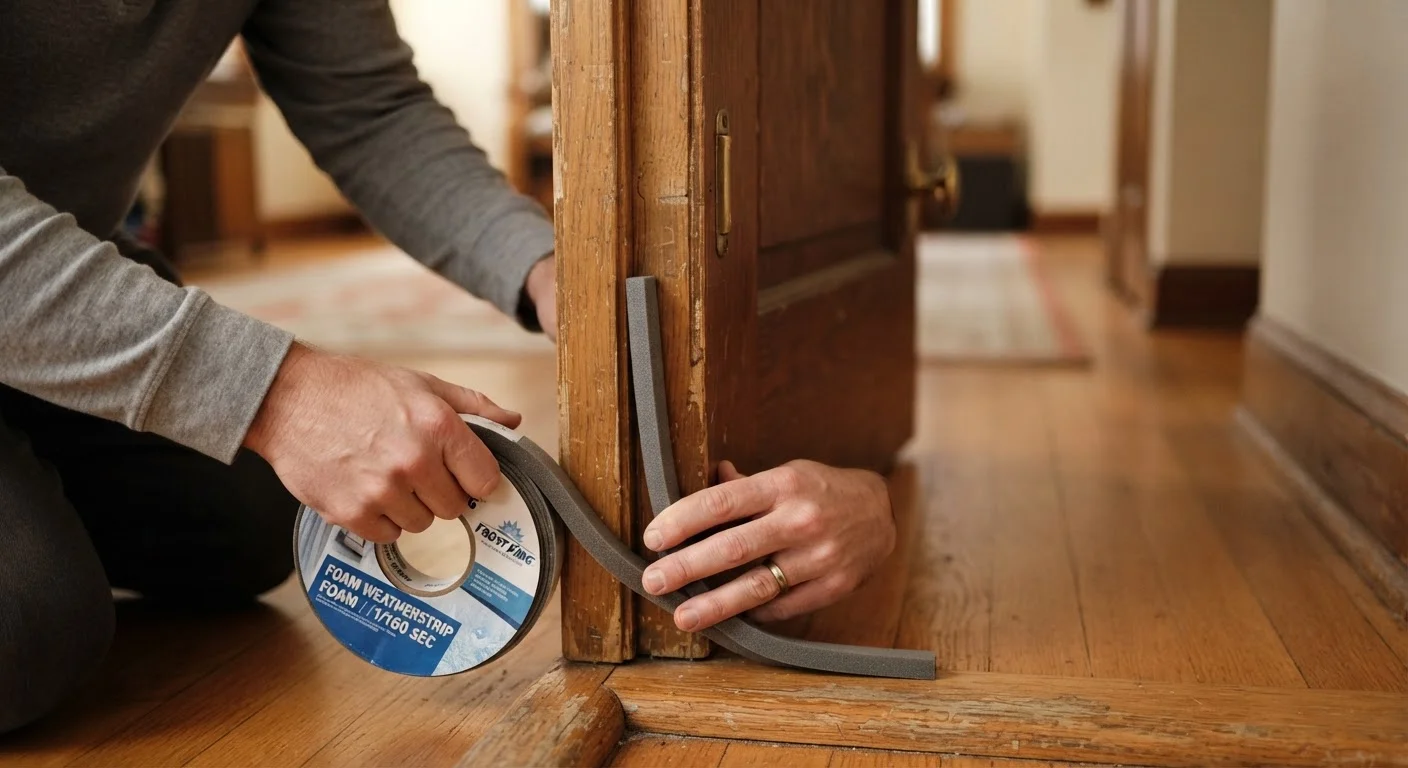
Photo: HorizonMetric.com | One Destination For Everyday Insights editorial
—— In This Article
Key Takeaways
- Weatherstripping seals gaps around doors and windows to reduce drafts and energy loss.
- Different materials suit different locations — foam, V-strip, felt, and door sweeps each have ideal uses.
- Most weatherstripping installations are straightforward DIY projects requiring only basic tools.
- Inspect weatherstripping seasonally and replace it when it shows cracking, compression, or gaps.
- Proper installation dramatically improves comfort and can lower heating and cooling costs over time.
What Is Weatherstripping and Why Does It Matter?
Weatherstripping is any flexible material used to seal movable components of your home — primarily doors and windows — against air infiltration. When those seals fail, outdoor air sneaks in and conditioned air escapes, forcing your heating and cooling system to work harder than necessary.
According to the U.S. Department of Energy, drafts from poorly sealed doors and windows can account for a significant portion of a home's total heating and cooling load. Beyond energy loss, failing weatherstripping allows moisture, dust, insects, and noise to enter more freely.
The good news: weatherstripping is among the most accessible home improvement projects available. Most types require no special skills, cost relatively little, and show immediate results. As part of a broader home maintenance routine — like the seasonal checks covered in our quarterly home maintenance checklist — weatherstripping inspections keep your home performing well year-round.
Up to 30%
Of home energy lost through air leaks
The U.S. Department of Energy estimates that air infiltration through gaps and cracks can account for up to 30% of a home's heating and cooling energy use.
$200–$600
Typical annual cost of drafts per home
Energy efficiency organizations estimate that unaddressed air leaks around doors and windows cost the average American homeowner hundreds of dollars annually in wasted energy.
15–30 min
Average installation time per door
Most single-door weatherstripping projects, including measuring, cutting, and applying all sides plus a door sweep, can be completed in under half an hour.
Types of Weatherstripping Explained
Choosing the right material for each location is the foundation of an effective weatherstripping project. Here's a breakdown of the most common types:
Foam Tape
Self-adhesive closed-cell foam is the most beginner-friendly option. It compresses to fill irregular gaps and works well on the top and sides of window sashes and around rarely-opened doors. It's less durable than other materials — expect to replace it every one to two years in high-traffic areas.
V-Strip (Tension Seal)
Also called tension seal, V-strip is a folded piece of plastic or metal that springs open to fill gaps. It fits inside door and window channels and is highly durable — lasting many years with minimal maintenance. It handles friction well, making it ideal for the sides of double-hung windows and door edges.
Door Sweeps
A door sweep attaches to the interior bottom edge of a door and brushes against the threshold to block the gap underneath. This is one of the most impactful seals you can add, since the bottom gap is typically the largest entry point for cold air and pests.
Felt Weatherstripping
Traditional felt strips are inexpensive but absorb moisture and wear quickly. They're best used in low-traffic, dry locations like attic hatch doors or storage closets.
Reinforced Vinyl or Rubber
These materials are more durable than foam and often come in bulb, D-profile, or bead shapes. They're pressed into channels or stapled in place and hold up well on exterior doors and casement windows.
When choosing between foam tape and V-strip for a frequently used exterior door, always go with V-strip or reinforced vinyl — foam compresses permanently within months on a high-traffic door.
The friction and repeated compression from daily use degrades foam far faster than other materials, making the upgrade in durability well worth the modest additional cost.
Before buying any weatherstripping, photograph the existing strip still in place, then bring a short sample with you when shopping — matching the profile precisely saves you from trial-and-error returns.
Weatherstripping comes in dozens of profiles and thicknesses; even a millimeter of mismatch can prevent a door from latching or leave gaps at the corners.
Where to Install Weatherstripping in Your Home
Not every gap needs the same solution. Matching the right material to the right location is what makes weatherstripping last.
- Exterior entry doors: Use reinforced vinyl or rubber on the door stop (the narrow strip the door closes against), and add a door sweep at the bottom. These doors open and close frequently, so durability matters.
- Interior doors to unconditioned spaces: Doors leading to garages or unheated basements benefit from foam tape or a door sweep to prevent cold air and fumes from migrating into living areas.
- Double-hung windows: V-strip works well in the sash channels. Use foam tape on the meeting rail — the horizontal bar where the upper and lower sashes meet.
- Casement and awning windows: These use a compression seal. Rubber or vinyl bulb weatherstripping fits into the frame channel and creates an airtight seal when the window is latched.
- Sliding doors and windows: Pile weatherstripping — tiny synthetic fibers on a flexible base — slides smoothly in the track without sticking.
Weatherstripping works best as part of a complete air-sealing strategy. It's also worth understanding how insulation plays into the larger picture — our article on common insulation myths can help clarify where weatherstripping ends and insulation begins.
How to Install Weatherstripping: Step-by-Step
Most installations follow the same basic process. Gather these tools before starting: a tape measure, scissors or a utility knife, a clean cloth, and adhesive (if not self-adhesive). Some V-strip or rigid materials may need a tack hammer or staple gun.
- Identify the gaps. Close the door or window and look for daylight around the edges. Slide a thin piece of paper around the frame — if it moves freely, there's a gap that needs sealing.
- Clean the surface. Wipe down the surface where you'll apply the weatherstripping with a clean, dry cloth. Remove old adhesive residue thoroughly. Adhesive won't bond well to dusty or greasy surfaces.
- Measure and cut. Measure each side of the frame separately — frames are rarely perfectly square. Cut the material slightly long, then trim to fit precisely. Gaps at corners let air in, so tight mitered or butted corners matter.
- Test the fit before peeling the adhesive backing. Hold the strip in place and close the door or window to check that it compresses without preventing a full, smooth close.
- Apply firmly. Peel the backing and press the strip evenly along the entire length. Use firm, steady pressure for at least 30 seconds to activate the adhesive.
- Install door sweeps separately. Align the sweep so it contacts the threshold lightly when the door is closed — not so tight that it drags heavily, which causes premature wear.
Test Door Seal Compression Before Finalizing
After installing weatherstripping on a door, close it slowly and listen for a slight puff of air — that's the seal compressing correctly. If the door feels unusually stiff or won't latch without force, the strip is too thick or positioned too far into the door stop. Trim or reposition before the adhesive fully cures.
Maintenance and When to Replace
Weatherstripping doesn't last forever. Check it as part of your seasonal home walkthrough, particularly before winter and summer when the stakes of air infiltration are highest.
Signs It's Time to Replace
- Visible cracks, tears, or crumbling material
- Flat or compressed foam that no longer springs back
- Daylight visible around a closed door or window
- Noticeably drafty rooms despite closed windows and doors
- Pest activity near door or window frames
Extending the Life of Your Weatherstripping
Keep surfaces clean and dry where strips are installed. Avoid slamming doors, which compresses foam and rubber seals unevenly over time. For V-strip in window channels, a light application of silicone lubricant (not oil-based, which attracts dirt) keeps it moving smoothly without adhesive breakdown.
As a general rule, foam tape should be inspected annually, V-strip and rubber profiles every two to three years, and door sweeps each fall before cold weather arrives. Staying on schedule keeps small air leaks from becoming noticeable comfort problems.
Don't Seal a Door So Tight It Won't Latch
Over-compressing weatherstripping creates new problems — it can warp door alignment over time, make locks difficult to engage, and strain hinges. The goal is a firm, consistent contact without forcing the door closed. If you're unsure, err on the side of slightly thinner material and test repeatedly before committing.

Home Editorial Team
Home Editorial Team is the collective byline for our editorial team and contributor network. Articles published under this byline or an editorial pen name are researched, written, and reviewed according to our editorial standards for clarity, consistency, and independence before publication.
View author profile